

One of the most important aspects of any solar PV installation on a metal roof is wire management, but even seasoned professionals can find this task confusing. There’s a myriad of things to track. You need to position the conductors so they correctly connect as modules are installed, keep all wires off the roof, deliver jumpers to the homerun and down to the inverter, and stay organized. If you have a large-scale job, this process becomes increasingly complex.
We’ve got some best practices to share on the planning and mechanics of wire management to make your installation easy. Today, we’ll show you why it’s important to:
- Prepare modules before they’re installed.
- Design your string and module layout to minimize installation time.
- Select the wire management method best suited to your project.
 |
If you need a refresher on wire management components, check out our recent blog. |
What Are the Ways to Mount Solar PV on Your Metal Roofing?
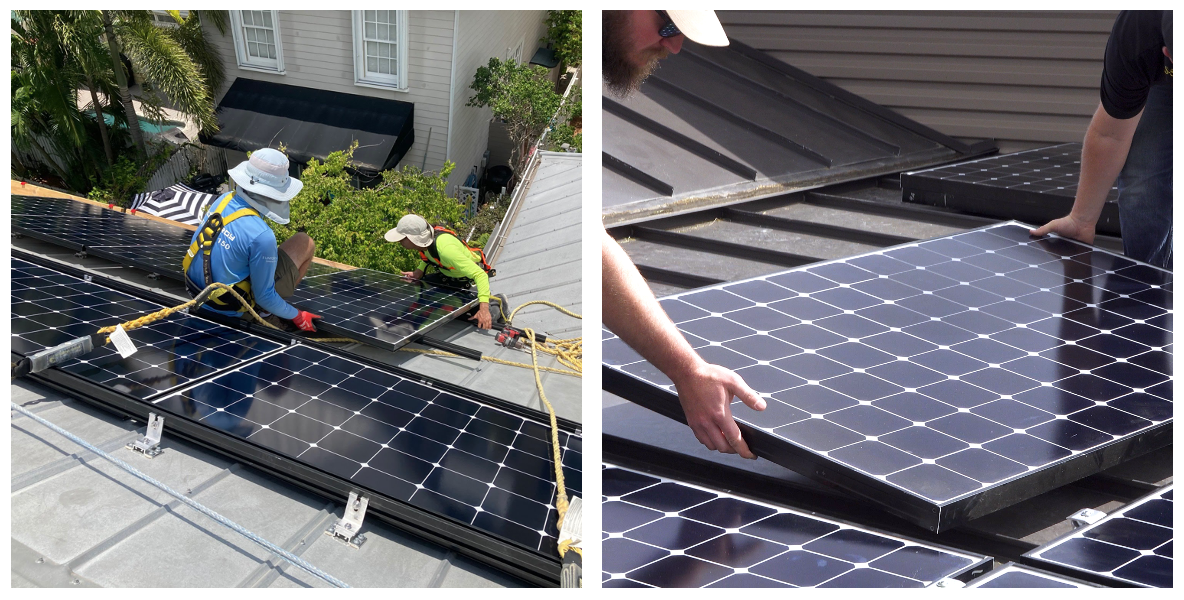 |
Installation comparison: Rail-based PV mounting on the left and rail-less PV mounting on the right.
There are two main ways of attaching solar PV modules to your metal roof:
- Rail-based module mounting is a common installation method where roof mounting attachments support rails that secure the solar modules in place.
- Rail-less (direct-attach™) module mounting uses the seams of the standing seam metal roof or the exposed-fastened roof’s trapezoidal or corrugated ribs as the rails. Rail-less mounting on metal roofs is a strategy S-5! introduced 12 years ago to bring you multiple benefits in terms of cost and labor. Read more about these benefits.
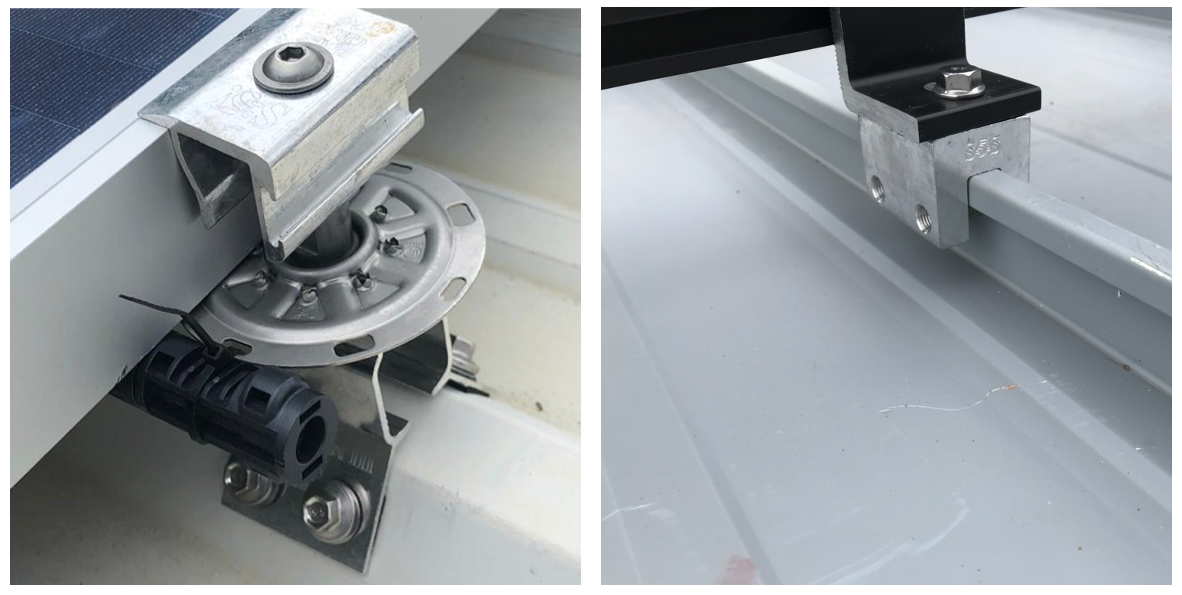 |
Solar PV install close-up: Rail-less mounting vs. rail-based mounting
Rail and rail-less mounting share similarities when it comes to best practices for wire management – including careful planning before you get onto the roof. When it comes to rail-less solutions, planning is essential. In addition, module preparation sets the stage for the most efficient install.
Why Does Module Preparation Matter?
Module preparation on the ground minimizes your time on the roof. The result is a smooth installation and less net time on the job.
The cable conductor leads on the underside of the modules are long and can get lost beneath the modules during installation. Flipping large modules over or trying to reach beneath them to find conductor ends while on the roof can be difficult, time-consuming and stressful.
By prepping your modules on the ground, you can easily coil up the excess wiring to keep the wires off the roof. This is a good time to position the conductor ends right where you need them to easily connect to adjacent modules or to jumpers at the end of the string. You can prepare all your modules first or split your crew (with some members preparing modules on the ground and others installing them concurrently on the roof).
Why Should You Create a Wire Management Plan?
Many installers are eager to take the equipment and hardware straight onto the roof. Unless you have a straightforward, small-scale residential job, this hurried approach could cost you more in time and headaches than you realize. The challenge is to figure out the best way to get all your wiring to the inverter, and the easiest installs are diligently planned on the ground.
Don’t skip this important step! Planning your project will ultimately save you time, money and hassle.

Strategic String Design
It’s a best practice to think through your string design to optimize the jumpers’ positions and minimize their lengths, making routing to the homerun simple. Map out your strings so each one has the conductor ends as close to the perimeter of your array as possible. When expertly performed, you won’t have to contend with conductor ends in the center of the array leaving you with hard-to-access cable wires. You can simply move to the outside of the array and easily connect the conductors to jumpers leading to the homerun.
 Like any new process, calculating your string design layout becomes easier the more often you do it, and you’ll reap the benefits of an uncluttered, smoother and faster installation once you’re on the roof.
As an example, imagine you have eight columns of modules in an array. If you chose to use strings of 16 modules, each string would run the length of one row and back down the other, bringing the string ends to the array’s perimeter. Due to potential obstacles, you may still have a few conductor ends that don’t reach the perimeter. But the closer your design brings the ends to the array’s edge, the more you’ll avoid running long jumpers deep into the array and securing them up off the roof.
Whether all your string ends are at the perimeter or you still have some in the middle of the array, your next step is to route them to the homerun. Let’s look at two wire management layout options to help organize your project: the “direct” method and the “trunk” method. Each come with pros and cons. The size of your project and your professional preferences will play an important part in which method you choose.
The Direct Method
For commercial projects, a common wiring design is the direct method. In this design, you simply attach jumpers at the end of each string and then run them the length of the panels to the homerun. This method seems simple enough, but it generally requires a lot of wiring to get to the homerun because your strings may end in the center of your array – leaving you with many long wires to keep off the roof.
If you’re using rails, you can zip-tie wires on the rails ahead of time, but this process takes work. For rail-less designs, you’ll clip the jumper wires to the module frames or rail-less mounting attachments.
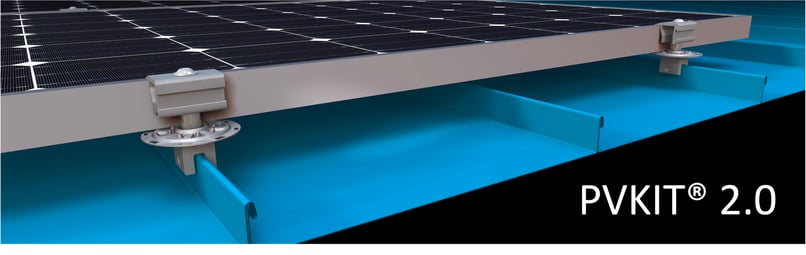
Looking for rail-less solutions with built-in slots for wire management? Check out the PVKIT.
With the direct method, you can refer to your wire management plan and lay your jumpers down ahead of module installation. On smaller jobs, you may decide to lay your jumper wires down as module installation progresses and clip them up as you go.
The direct method is a good choice for many residential installations because fewer total strings (two or three) need to connect to the homerun, so you have fewer long jumper wires to manage. But when it comes to larger projects, the direct method requires more installation time and tends to become disorganized.
Direct Method Snapshot
- Wires run “directly” to the homerun
- Can be laid out ahead of module installation
- Can be laid out on-the-fly
- More labor-intensive
- Less cost-effective
- Becomes more difficult as the scale of the array increases
Another alternative better suited to larger, more complex solar PV systems is the trunk method.
The Trunk Method
A “trunk” is a wire management tray or conduit where jumper wires are bundled together and routed to the homerun. The trunk method requires preplanning where the strings’ conductor ends will attach to the jumpers and where the wire management trays or conduit will go. This design saves the time and effort of having to clip up the jumpers to individual module frames or rails (as required in the direct method). However, the trunk method demands advance work because all your jumpers must be in place before modules are installed.
Many consider this method more organized and easier to manage, but the size of your system makes a difference. When you compare the trunk method to the direct method, the two approaches can vary widely in cost. Ultimately, you can save time and money by using specific wiring designs such as the trunk method on large projects.
Trunk Method Snapshot
- More hands-on time and preplanning module installation to determine where cables go
- Wiring is physically laid out before modules are installed
- Use of cable trays (preferred method) or conduit
- Simplifies wire routing
- Less installation time
Interested in learning more about the trunk method and other approaches to managing wire when installing bigger solar systems?
Ideas to Hold Onto
An efficient solar PV array installation relies on good wire-management organization. It’s easy to get tangled up in the process if you aren’t sure where to begin. Today we covered the best practices for planning the electric design of your array:
- Advance module preparation
- String design and layout for faster installations
- Project-specific wire management methods
Looking for guidance in sourcing the right product for your application and determining the overall layout? Let our Solar Calculator do the work for you!
|
And if you want a primer on wire management, review our piece on how to Build a Smart Foundation for Wire Management Using Rail or Rail-less Solar PV on Your Metal Roof. |