
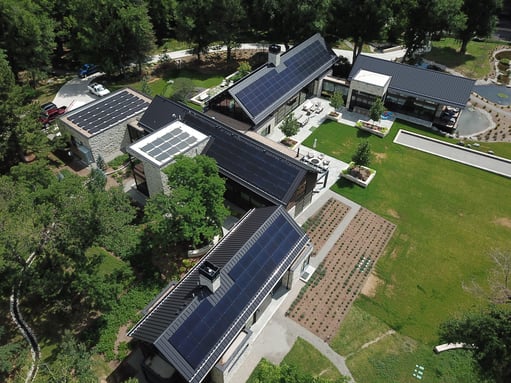
If you’re thinking of putting solar PV on your metal roof to generate renewable energy and save money over time, you’ve made a great choice. Metal roofs are an ideal platform for mounting solar modules thanks to their long service life and durability. Solar arrays have a service life of 35+ years, and metal roofing has a demonstrated service life of 60 years. Aside from metal, there are no other roof types that measure up to that without requiring replacement. Both standing seam and exposed-fastened metal roofs support solar arrays very effectively.
 There are two main approaches to attach solar modules: one uses rails; the other is rail-less. For railed installations, metal rails are secured to the roof and solar modules are attached to the rails to hold them in place. Rail-less systems attach components directly to the roof to support the solar modules. Each has its own unique aspects.
Let’s look at some pros and cons regarding roof considerations, aspects of layout and cost.
Roof Considerations for Solar Modules

Question: How Are Solar Modules Secured in Place on Standing Seam or Exposed-Fastened (EF) Metal Roof Types?
Answer: With Rail: Rails mount to standing seam metal roofs via non-penetrating clamps. EF has two options: brackets can attach to the roof panel’s rib only, or brackets may attach in the roof panel’s valley and into the structure when preferred.
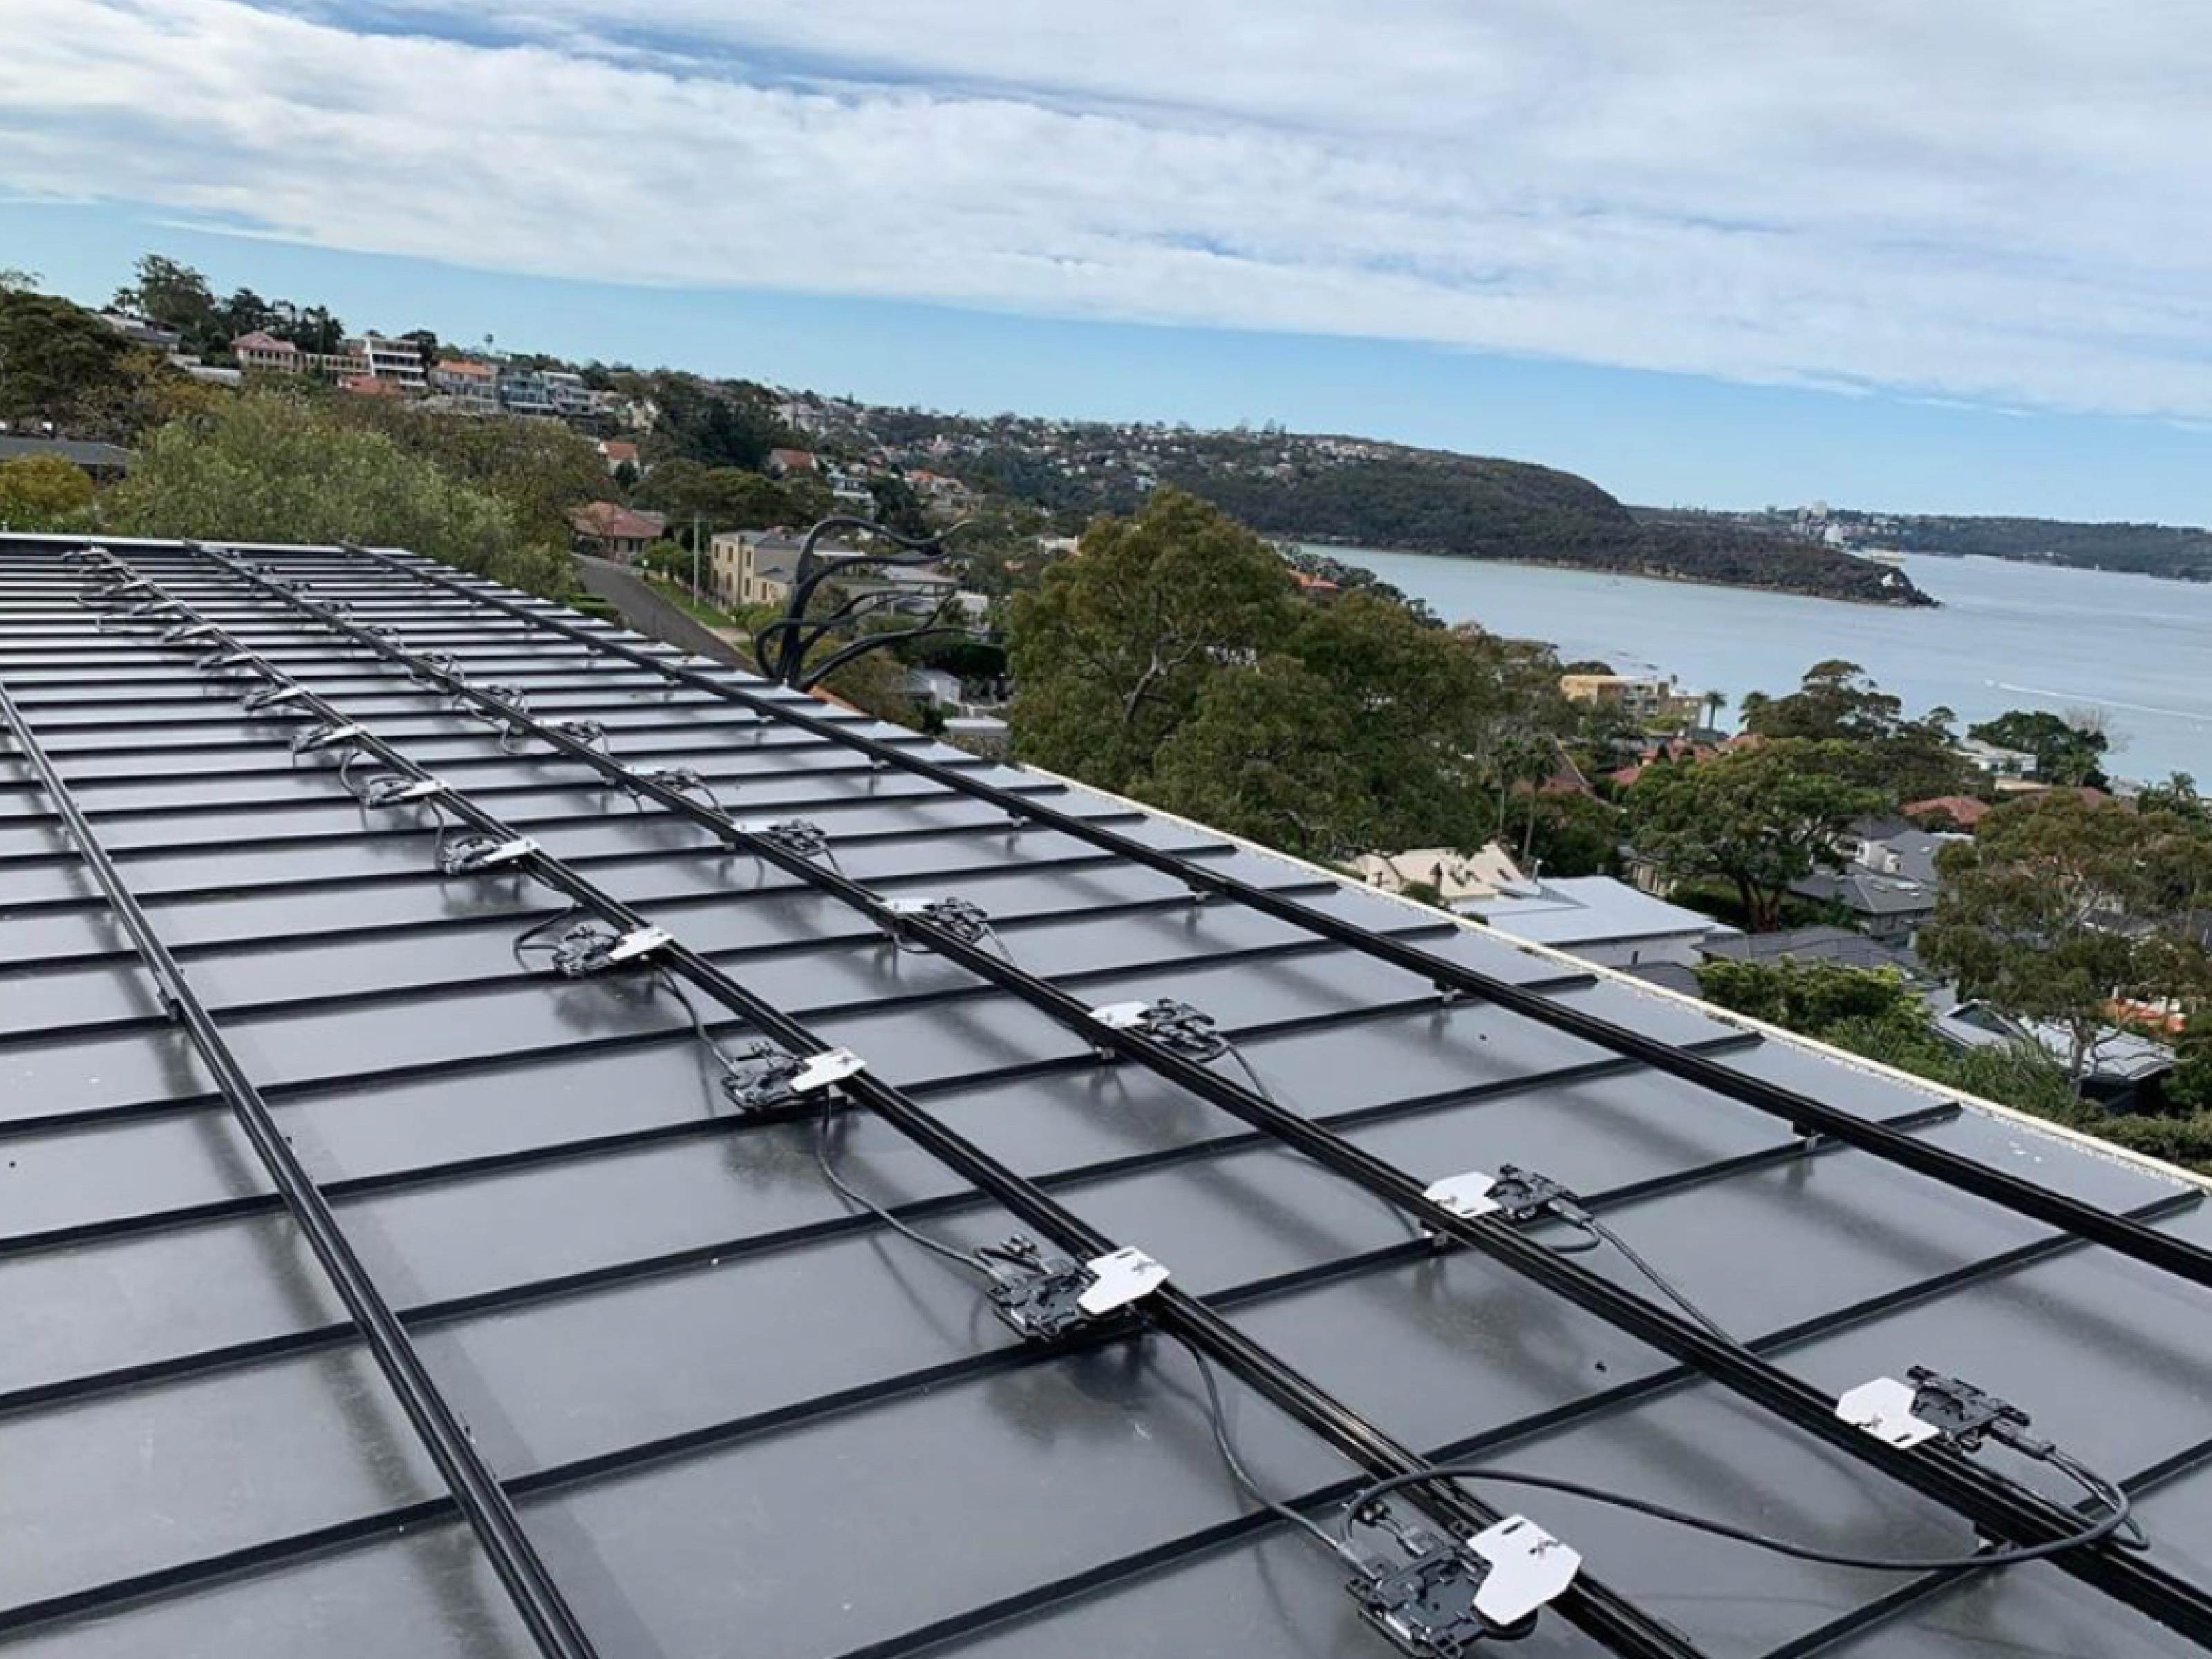
Answer: With Rail-less: Rail-less solutions use the roof’s structural seams or ribs as the rails. The seams on standing seam roofs become the rails. EF trapezoidal ribs or corrugations are also structural elements of the roof design and can be used as rails. This offers greater flexibility in module placement because they completely cover the roof from end to end on 6- to 12-inch spacings.
Example of modules mounted on a standing seam metal roof using rail-less solar mounting
(Product shown: S-5! PVKIT® railless solar mount)

Question: Does the Weight of Your Solar PV Mounting System Matter?
Answer: With Rail: The weight of the system can make a difference. Clamps and rails are ~ 19 lbs./kilowatt peak (kWp). Most new metal roofs can support the weight.
Answer: With Rail-less: Rail-less is <3 lbs./kWp, which equates to approximately 85% lower added dead load. Lower added load is extremely helpful as an existing building may not have been designed to carry much additional weight. Rail-less also offers 25% better load distribution onto the roof and into the structure.
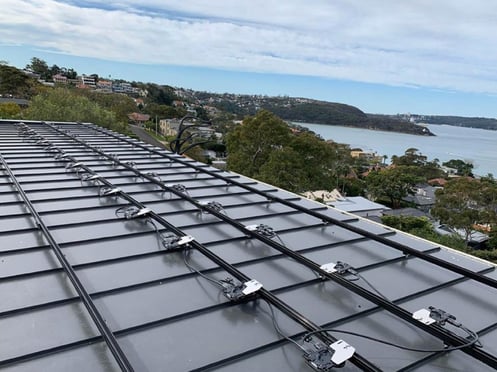
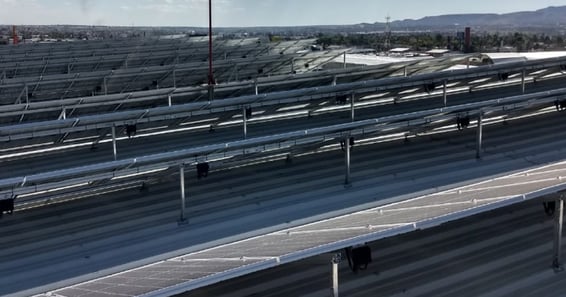
Residential project with a rail-less solar mounting system

Question: Are There Obstacles on Your Roof (Skylights, HVAC Equipment, Vents, Hips, Valleys or Dormers)?
Answer: With Rail: Rails will likely need to be field-cut to work around obstructions and architectural elements.
Answer: With Rail-less: Rail-less solutions easily adjust to avoid obstacles and can be used in smaller areas where cutting rails to fit properly is time-consuming and unsightly.
Solar Module Layout

Question: Is There a Difference In How the Solar Modules Are Oriented?
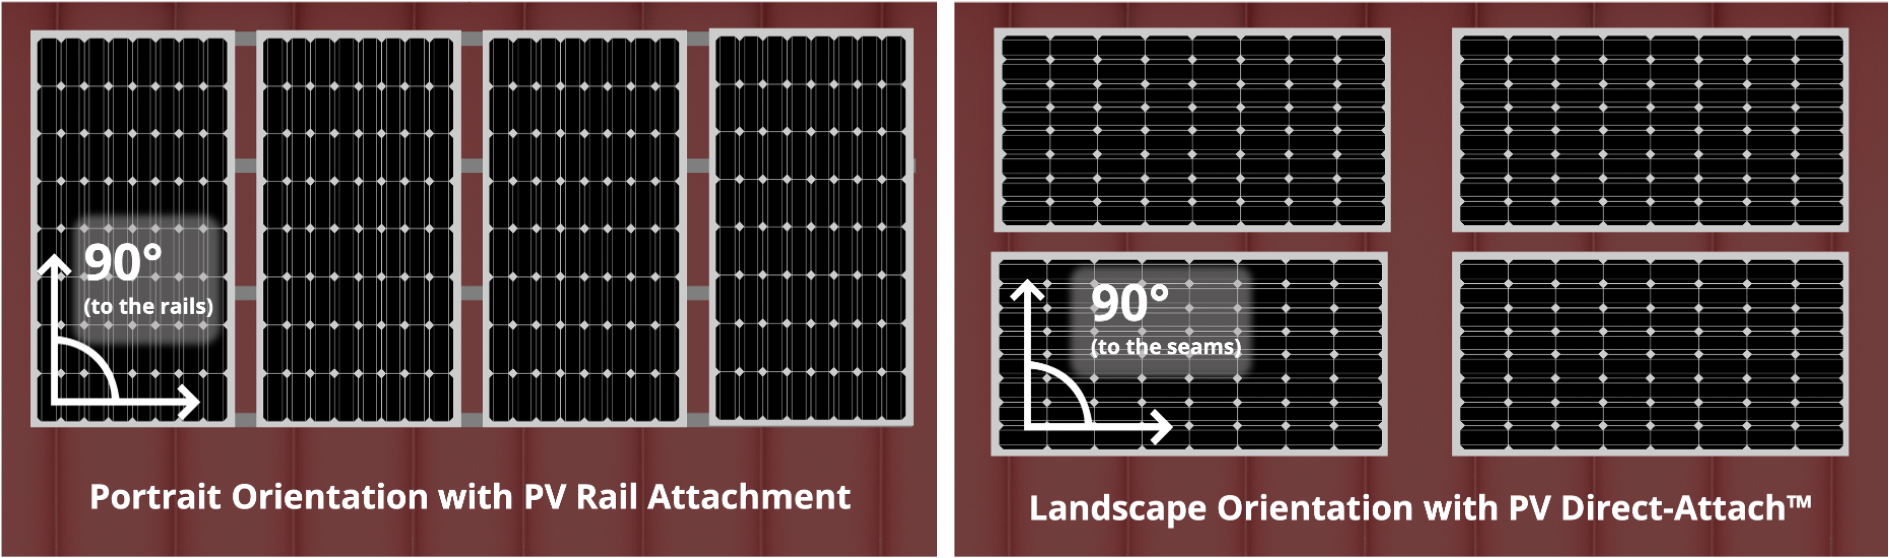
Answer: With Rail: Rails are laid out across the ribs or seams (East-West), resulting in a portrait module orientation – 90 degrees to the rails.
Rail-based solar mounted system
Answer: With Rail-less: Because standing seams or exposed-fastened ribs are the rails and run in a North-South direction, modules are installed in landscape orientation – still 90 degrees to the roof’s inherent “rails.”
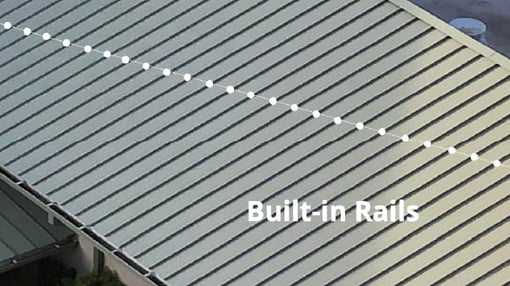
The standing seams or exposed-fastened ribs of a metal roof offer built-in rails for the attachment of solar modules.
While we’re on the topic of laying out your solar PV array, planning wire management is also an important issue. Check out our latest video on Best Wire Management Practices in Railed and Rail-less Solar PV.

Question: Do You Need to Tilt Your Panels?
Answer: With Rail: If you have a relatively flat roof and want to tilt the array to capture the sun’s best angle, tilting is possible.
Answer: With Rail-less: Tilting is not possible.
Example of a solar PV system mounted using tilted rails
(Product shown: S-5! ProteaBracket™)
Need help finding the right bracket for your upcoming solar mounting project?
Tell us about your project and we'll guide you to the best fit product for your specific roof panel.
Solar Installation Costs

Question: How Much Do You Want to Spend on Installation?
Answer: With Rail: Rails and components require time for layout, assembly, labor and installation. 
Answer: With Rail-less: Pre-assembled rail-less systems require only about 90 seconds per module to install once you get the hang of it.


Question: How Many Parts Are Required?
Answer: With Rail: Traditional rail systems generally require nine to 12 components for a solar PV array.
Answer: With Rail-less: State-of-the-art, rail-less systems can consist of no more than three components and save up to 35% or more on material costs.

Question: Will You Need to Ship Materials?
Answer: With Rail: Rail systems require heavy components – and many more of them than rail-less. Using the example of a 50-kilowatt (kW) system, rail mounting would clock in at about 970 pounds, which means you pay the weight-calculated commercial freight charges.
Answer: With Rail-less: Fewer materials and much lighter components average 149 pounds for the same 50 kW system as above—15% the weight of rail mounting.
Rail-mounted solar system
Ideas to Hold Onto
Rail and rail-less solar PV array mounting solutions each have their pros and cons. Today, we covered just a few ideas on roof considerations, aspects of layout and cost to give you an idea of the differences.
No matter which attachment method you choose, we have proven solutions to meet your needs.
 |
Still weighing rail vs. rail-less? Get the checklist to walk you through the multiple factors and help make an informed decision. |
If you have specific questions, we’re always here to help. Simply comment below or contact us at support@s-5.com.